-
Visual C++에서 SDL2 라이브러리 사용하기2프로그래밍/윈도우즈 2021. 3. 28. 13:56728x90
SDL은 버전이 2로 올라가면서 윈도우 컨트롤 오브젝트를 이용 할 수 도 있게 되었습니다. 먼저, MFC App 프로젝트를 새로 만듭니다.
저는 저번에 만들었던 프로젝트가 있는 솔루션 파일에 Test2로 추가했습니다.
이전 글 참조: Visual C++에서 SDL2 라이브러리 사용하기

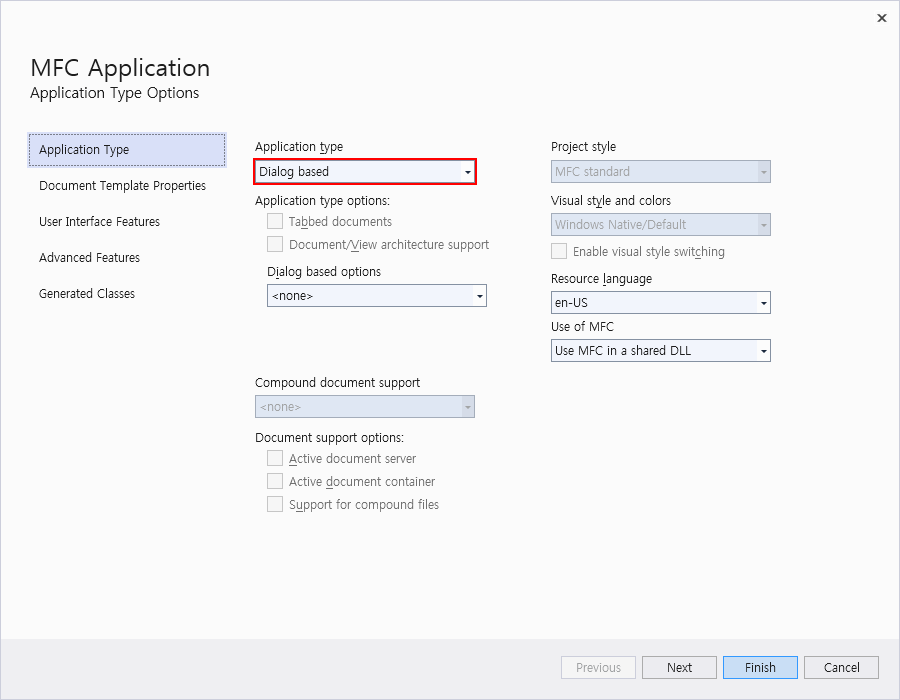
다이얼로그 베이스로 만들겠습니다.
(프로젝트 생성 뒤 다이얼로그 위에 기본으로 생성되는 오브젝트들은 삭제했습니다.)
이전과 마찬가지로 프로젝트 환경설정에서 SDL2 헤더와 라이브러리 경로 등을 설정해 줍니다.
- C/C++ > General > Additional Include Directories: $(SolutionDir)\3rdparty\SDL2-2.0.14\include
- Linker > General > Additional Library Directories: $(SolutionDir)\3rdparty\SDL2-2.0.14\lib\x64
- Linker > Input > Additional Dependencies: SDL2.lib 추가 (이번에는 SDL2main.lib은 추가하실 필요 없습니다.)

Test2Dlg.h 파일입니다. 추가된 부분은 한글로 주석을 달아 두었습니다.
// Test2Dlg.h : header file
//

#pragma once

#include "SDL.h" // 추가


// CTest2Dlg dialog
class CTest2Dlg : public CDialogEx
{
// Construction
public:
	CTest2Dlg(CWnd* pParent = nullptr);	// standard constructor

// Dialog Data
#ifdef AFX_DESIGN_TIME
	enum { IDD = IDD_TEST2_DIALOG };
#endif

	protected:
	virtual void DoDataExchange(CDataExchange* pDX);	// DDX/DDV support


// Implementation
protected:
	HICON m_hIcon;

	// Generated message map functions
	virtual BOOL OnInitDialog();
	afx_msg void OnSysCommand(UINT nID, LPARAM lParam);
	afx_msg void OnPaint();
	afx_msg HCURSOR OnQueryDragIcon();
	DECLARE_MESSAGE_MAP()

protected:
	SDL_Window* m_pScreen; // 멤버 변수 추가
	SDL_Renderer* m_pRenderer; // 멤버 변수 추가
};
Test2Dlg.cpp 파일 입니다. 마찬가지로 추가된 부분은 한글로 주석을 달아 두었습니다.
// Test2Dlg.cpp : implementation file
//

#include "pch.h"
#include "framework.h"
#include "Test2.h"
#include "Test2Dlg.h"
#include "afxdialogex.h"

#ifdef _DEBUG
#define new DEBUG_NEW
#endif

#pragma comment(lib, "SDL2.lib") // 라이브러리 추가


// CAboutDlg dialog used for App About

class CAboutDlg : public CDialogEx
{
public:
	CAboutDlg();

// Dialog Data
#ifdef AFX_DESIGN_TIME
	enum { IDD = IDD_ABOUTBOX };
#endif

	protected:
	virtual void DoDataExchange(CDataExchange* pDX);    // DDX/DDV support

// Implementation
protected:
	DECLARE_MESSAGE_MAP()
};

CAboutDlg::CAboutDlg() : CDialogEx(IDD_ABOUTBOX)
{
}

void CAboutDlg::DoDataExchange(CDataExchange* pDX)
{
	CDialogEx::DoDataExchange(pDX);
}

BEGIN_MESSAGE_MAP(CAboutDlg, CDialogEx)
END_MESSAGE_MAP()


// CTest2Dlg dialog


CTest2Dlg::CTest2Dlg(CWnd* pParent /*=nullptr*/)
	: CDialogEx(IDD_TEST2_DIALOG, pParent)
{
	m_hIcon = AfxGetApp()->LoadIcon(IDR_MAINFRAME);

	// 멤버 변수 초기화
	m_pScreen = NULL;
	m_pRenderer = NULL;
}

void CTest2Dlg::DoDataExchange(CDataExchange* pDX)
{
	CDialogEx::DoDataExchange(pDX);
}

BEGIN_MESSAGE_MAP(CTest2Dlg, CDialogEx)
	ON_WM_SYSCOMMAND()
	ON_WM_PAINT()
	ON_WM_QUERYDRAGICON()
END_MESSAGE_MAP()


// CTest2Dlg message handlers

BOOL CTest2Dlg::OnInitDialog()
{
	CDialogEx::OnInitDialog();

	// Add "About..." menu item to system menu.

	// IDM_ABOUTBOX must be in the system command range.
	ASSERT((IDM_ABOUTBOX & 0xFFF0) == IDM_ABOUTBOX);
	ASSERT(IDM_ABOUTBOX < 0xF000);

	CMenu* pSysMenu = GetSystemMenu(FALSE);
	if (pSysMenu != nullptr)
	{
		BOOL bNameValid;
		CString strAboutMenu;
		bNameValid = strAboutMenu.LoadString(IDS_ABOUTBOX);
		ASSERT(bNameValid);
		if (!strAboutMenu.IsEmpty())
		{
			pSysMenu->AppendMenu(MF_SEPARATOR);
			pSysMenu->AppendMenu(MF_STRING, IDM_ABOUTBOX, strAboutMenu);
		}
	}

	// Set the icon for this dialog.  The framework does this automatically
	//  when the application's main window is not a dialog
	SetIcon(m_hIcon, TRUE);			// Set big icon
	SetIcon(m_hIcon, FALSE);		// Set small icon

	// TODO: 아래 코드가 추가되었습니다.
	// Initialize SDL
	if (SDL_Init(SDL_INIT_VIDEO) < 0)
	{
		TRACE("Could not initialize SDL! (%s)\n", SDL_GetError());
	}

	// Create window
	m_pScreen = SDL_CreateWindowFrom(GetSafeHwnd());
	ASSERT(m_pScreen);

	// Create renderer
	m_pRenderer = SDL_CreateRenderer(m_pScreen, -1, SDL_RENDERER_ACCELERATED);
	ASSERT(m_pRenderer);

	// Clear renderer (white)
	SDL_SetRenderDrawColor(m_pRenderer, 255, 255, 255, SDL_ALPHA_OPAQUE);
	SDL_RenderClear(m_pRenderer);

	// Draw rect (red)
	SDL_Rect r = {50, 50, 100, 100};
	SDL_SetRenderDrawColor(m_pRenderer, 255, 0, 0, SDL_ALPHA_OPAQUE);
	SDL_RenderDrawRect(m_pRenderer, &r);

	return TRUE;  // return TRUE  unless you set the focus to a control
}

void CTest2Dlg::OnSysCommand(UINT nID, LPARAM lParam)
{
	if ((nID & 0xFFF0) == IDM_ABOUTBOX)
	{
		CAboutDlg dlgAbout;
		dlgAbout.DoModal();
	}
	else
	{
		CDialogEx::OnSysCommand(nID, lParam);
	}
}

// If you add a minimize button to your dialog, you will need the code below
//  to draw the icon.  For MFC applications using the document/view model,
//  this is automatically done for you by the framework.

void CTest2Dlg::OnPaint()
{
	if (IsIconic())
	{
		CPaintDC dc(this); // device context for painting

		SendMessage(WM_ICONERASEBKGND, reinterpret_cast<WPARAM>(dc.GetSafeHdc()), 0);

		// Center icon in client rectangle
		int cxIcon = GetSystemMetrics(SM_CXICON);
		int cyIcon = GetSystemMetrics(SM_CYICON);
		CRect rect;
		GetClientRect(&rect);
		int x = (rect.Width() - cxIcon + 1) / 2;
		int y = (rect.Height() - cyIcon + 1) / 2;

		// Draw the icon
		dc.DrawIcon(x, y, m_hIcon);
	}
	else
	{
		CDialogEx::OnPaint();
	}

	SDL_RenderPresent(m_pRenderer); // m_pRenderer를 화면에 출력
}

// The system calls this function to obtain the cursor to display while the user drags
//  the minimized window.
HCURSOR CTest2Dlg::OnQueryDragIcon()
{
	return static_cast<HCURSOR>(m_hIcon);
}
위 코드를 실행한 모습 입니다.

코드를 보시면 아시겠지만 이전 글에서는 SDL_CreateWindow() 함수를 사용했지만, 이번에는 SDL_CreateWindowFrom() 함수를 사용해서 다이얼로그의 핸들러를 넘겨줬습니다. 그렇기 때문에 다른 컨트롤 오브젝트의 핸들러를 넘겨준다면 다른 곳에서도 SDL을 사용해서 렌더링이 가능해집니다.
예를 들어 다음과 같이 다이얼로그 위에 Static 컨트롤 오브젝트를 만들어 그 핸들러를 넘겨주면 아래와 같이 실행됩니다.
	// Create static
	CRect rStatic = {0, 0, 200, 200};
	CStatic* pStatic = new CStatic();
	pStatic->Create(_T(""), WS_CHILD|WS_VISIBLE|SS_BLACKFRAME|SS_NOTIFY, rStatic, this, 5000);

	// Create window
	m_pScreen = SDL_CreateWindowFrom(pStatic->GetSafeHwnd());
	ASSERT(m_pScreen);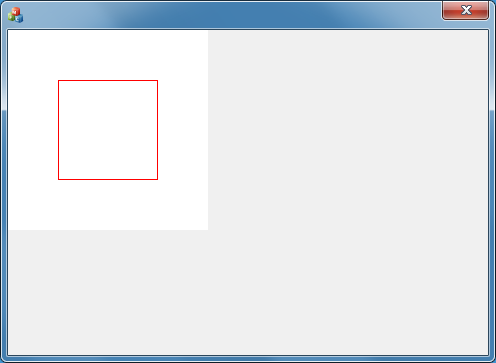
이렇듯 SDL2는 이전 버전과는 다르게 윈도우 컨트롤 오브젝트를 사용할 수 있고 또 컨트롤 오브젝트 여러 개를 사용하는 것도 가능합니다.
728x90'프로그래밍 > 윈도우즈' 카테고리의 다른 글
Visual C++에서 SDL2 라이브러리 사용하기 (0) 2021.03.28 Windows용 RTSP 서버 소스 (0) 2021.03.23 Windows용 OpenXLSX 라이브러리 컴파일하기 (0) 2021.03.20 Windows에서 USB 시리얼 포트 자동 인식하기 (1) 2013.03.13